Tethered Shooting with Lightroom Auto Import
25th November 2014
Lightroom has its own built-in support for tethered shooting, but when compared to a dedicated application these capabilities are very limited. Lightroom can tether to a single camera, and show the current aperture, shutter speed, and ISO, but not much else. There is a single button to trigger the shutter, but thats the only remote operation you can do. But of course the great benefit is that new photos are automatically imported into Lightroom, so you can view and work on them immediately.
Luckily Lightroom also has another mechanism for automatically importing photos, and its called Auto Import. The concept is that you specify a certain directory for Lightroom to watch, and whenever a new photo is saved to that directory it is automatically imported into Lightroom. So this opens the possibility for using any tethered shooting app to control and communicate with the camera, as long as it can also be configured to automatically download new photos to the directory that Lightroom is watching.
The steps below show you how to set this up in both Lightroom and Smart Shooter. You'll then be able to continue to used advanced tethering capabilities such as liveview, camera presets, scripting, and multiple cameras, but still be able to view and edit the photos immediately in Lightroom.
Auto Import Settings
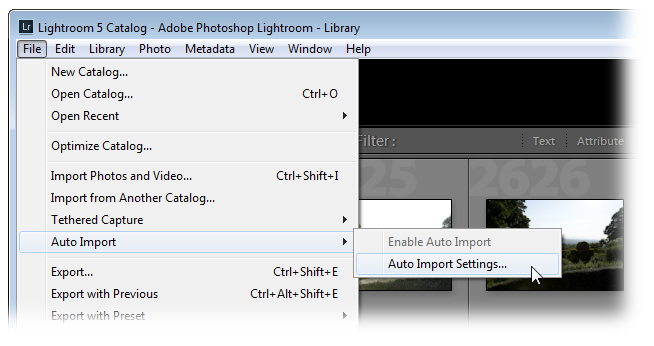
First open the Lightroom settings for Auto Import. You get to this from the menu as shown below.
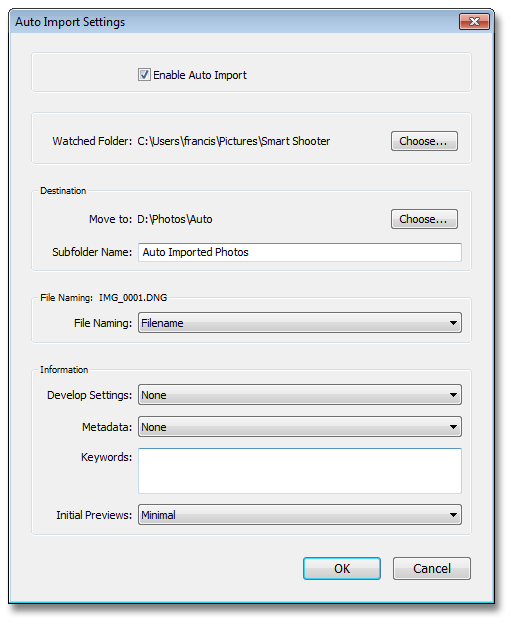
The screenshot below shows the Auto Import Settings window. Here you specify the Watched Folder as the directory where Smart Shooter is going to download new photos. The Destination allows you to specify where Lightroom will move the photo during automatic import. There are also other options for controlling if/how the filename is computed for the newly imported photos.
Smart Shooter Settings
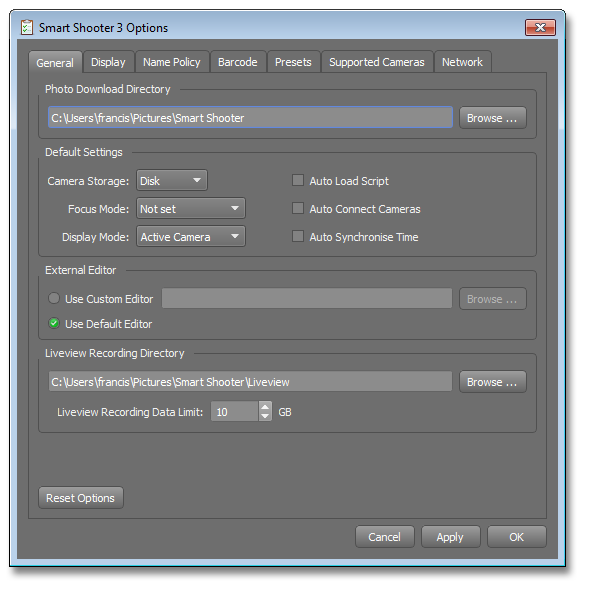
Now in Smart Shooter you need to make sure its Photo Download Directory is set correctly and matches what you configured for Lightroom's Watched Folder. The screenshot below shows the Options window for Smart Shooter, and highlighted in blue is where to set the directory.
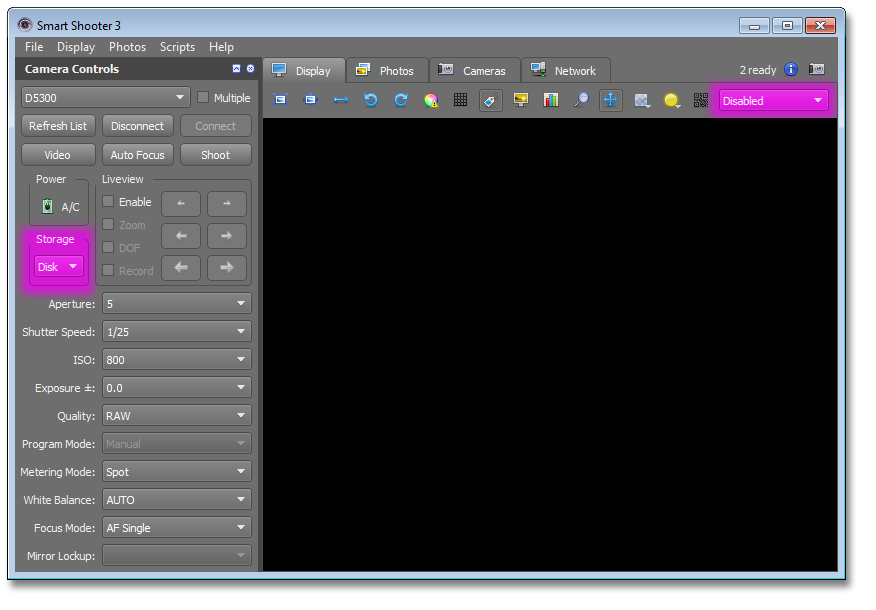
And finally in the Camera Controls window of Smart Shooter, make sure the Storage mode is set to Disk. This means that any new photos are automatically downloaded, rather than just being saved on the camera's memory card. And remember that Smart Shooter has to be connected to the camera during this process, so ensure you've already clicked Connect. It's also worth setting the display mode to Disabled so that Smart Shooter itself does not try to decode and view the images, as you'll be doing this in Lightroom anyway. The screenshow below shows where to change both of these settings.
And thats it!
Now whenever the camera captures a photo, either from you manually pressed the shutter button on the camera or clicking Shoot in Camera Controls window, Smart Shooter will immediately download the photo to your computer. Then Lightroom will detect it, and automatically import it ready for the next steps of your workflow.
blog comments powered by Disqus